Thursday, September 1st - - With the campsite in shade and temperatures in the low 30s this morning I went and found a nice sunny spot in which to eat breakfast. Then it was off to see the sights!

Sometimes, I guess, Buffalo prefer an easy route to wherever they are going! They were frequently seen alongside and on the road, usually only one or two bison at a time.
My primary destination this morning was the Grand Canyon of the Yellowstone with its beautiful Lower Falls and Upper Falls. Located at the northeastern corner of the southern highway loop, the 40 mile drive from the campground took about two hours, with stops along the way at the Mud Volcano Area and Sulphur Caldron.

My first stop in the “Grand Canyon” area was Artist Point on the South Rim.

Artist Point provides stunning views of the 308-foot Lower Falls. It is, quite simply, breathtaking! The morning light along with a hazy sky enhanced the view allowing details in the sides of the canyon to show up, though the colors are somewhat muted.

A closer view of the Lower Falls.

And, even closer.

The colors of the canyon didn't show up clearly in the photos of the Lower Falls, but, oh my, how they “popped” when looking to the northeast! The fantastic colors of the north side of the canyon come from rhyolite and sediments that have been altered by hydrothermal action (i.e. hot water from springs that were active in years past).

The Upper Falls is not quite as impressive (only 109 feet) or photogenic as the Lower Falls but it was still worth the walk down a short trail to see it.

It was also easier to access the Brink of the Upper Falls from another short trail. The Brink of the Lower Falls was a strenuous trail that dropped 600 feet in a very short distance. I passed on that one but did go to the Brink of the Upper Falls, shown above.

The view from Inspiration Point, on the North Rim, looking to the northeast.

As I drove up to the northwest side of the park to the Mammoth Hot Spring Terraces, the clouds moved in.

I walked along most of the boardwalk trails in the lower terraces but my legs were getting a little wobbly by the time I made it to the upper terrace area. Whether it was from the lighting conditions or the fact that many of the springs in that area have gone dormant, I was disappointed with my visit there. The photos I took were rather blah.

The view from the front of the upper terraces was rather impressive though. On the drive back to the campground, I took the “shorter” route along the west side of the northern loop then cutting across to Canyon Village and the eastern side of the southern loop. It was still about a 75 mile drive back to the campground.


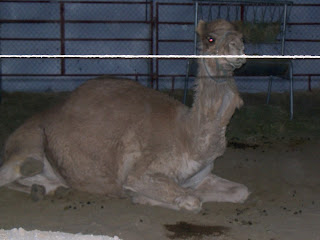 we went to a feedstore one evening to get some feed tubs for my horses, (heck of a note when you go 250 miles to get feed tubs for horses), Landmark Feedstore in Mesquite, NM. They have a few animals for people to see such as Clyde the Camel, a steer, a bison, some miniture donkeys, a horse, some pigs, and sheep. It was almost dark but the photos didn't come out that bad.


